Kayak Lifting Rack
Below is a 3D assembly drawing of a kayak lifting rack for a car. I designed, researched, and drew in CAD the kayak rack last year for my first year in Independent Study here. This year I want to expand my 3D drafting knowledge, and I thought that this would be a nice way to transition from 2D to 3D. After I finished drawing the kayak lifting rack in 3D, I 3D printed and assembled it at a 1:7 scale. I also rendered my assembly to make it as realistic as possible. I also explored animation with my trebuchet and created a simplified version of my assembly.
Rendered Imaged and Individual and Assembled Parts
3D Printed Assembly (1:7 scale)
Cellphone Case
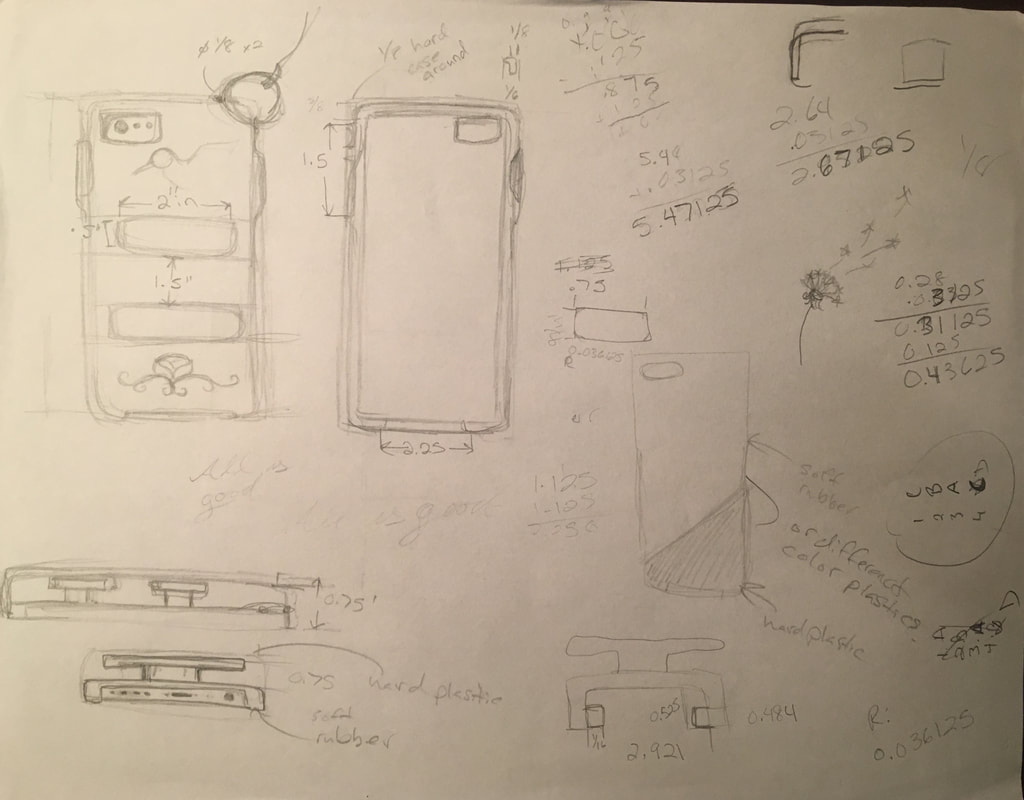
Below is a 3D assembly drawing of a cellphone case I designed. I wanted to have a small project to do in between my larger, more complex projects and thought that designing a cellphone case would be a great project to do. I researched cellphone case dimensions and sketched different unique designs until I came to a final design. I made removable "clips" for the case that allow for better grip and a place to wrap head phones around, but if a person does not want that, they can easily remove the "clips". After I finished drawing the cellphone case in Inventor, I 3D printed and assembled it. I even 3D printed the cellphone case with a flexible filament to make sure the case could be easily taken on and off. I also did a rending of my small assembly to make it as realistic as possible.
Sketches
Rendered Imaged and Individual and Assembled Parts
3D Printed Assembly (1:1 scale)
Trebuchet
Below is a 3D assembly drawing I designed and drew in Inventor. Last year, I had to build a trebuchet for my physics class, and I designed my trebuchet in my Independent Study class. I researched and explored different designs until I found one I liked and drew it in AutoCAD here. I found the project unique and fun last year, so I thought it would be interesting to create a 3D drawing of the trebuchet and expand my Inventor knowledge. After I finished drawing the trebuchet in 3D, I 3D printed and assembled it at a 40% scale. I also rendered my assembly to make it as realistic as possible. I also explored animation with my trebuchet and created a simplified version of my assembly.
Rendered Imaged and Individual and Assembled Parts
3D Printed Assembly (40% scale)
ASBE Competition
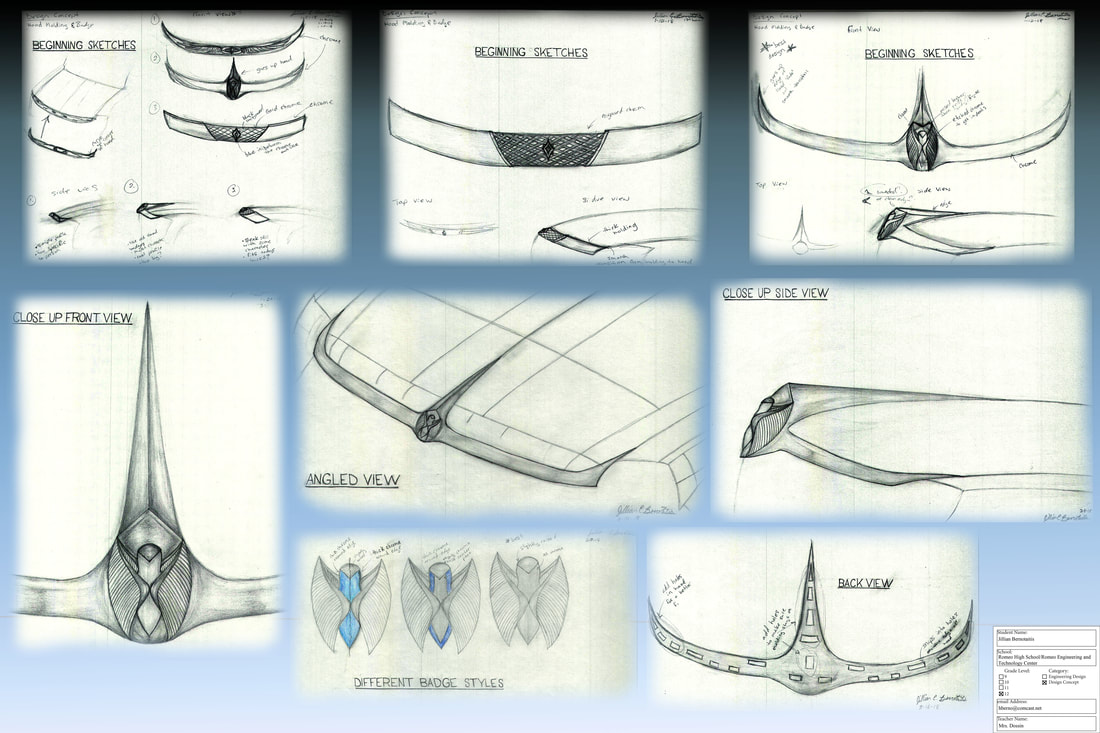
ASBE Hood Molding and Badge
I took part in the 2018 asbe (American Society of Body Engineers) foundation High School Design Challenge. My other classmates and I were given a choice between designing a hood molding and badge for the Design Concept Category or designing a bumper step and insert for the Engineering Design Category. Each project was for a mid-size pickup truck. After some consideration, I decided to do the challenge for the Design Concept Category. I sketched a few different designs and narrowed it down to two designs. I developed the two designs a little more until I decided on one design. My final hood molding and badge was a thin chrome molding that went up the sides and center of the hood with a winged figure in the center for the badge. I drew inspiration from classic cars, especially trucks from the 1940's. I wanted to give the truck more character than other trucks today. My design won first place in the Design Concept Category.
ASBE Write Up
For the ASBE Competition, we had to write at least one page to explain our idea and our design process. Here is my write up for my hood molding and badge.
Jillian Bernotaitis
12th Grade
Romeo High School
13 March 2018
ASBE Project Design Process Essay
When I was shown the ASBE project, I analyzed and identified what the challenge was to determine the best way to approach the assignment. After I understood what was required of me, I began to brainstorm different designs for moldings that would cover the edge of the hood. I thought about how thick of a molding I should have and how the molding would end on the sides of the hood. I wanted to have a molding that would compliment the badge nicely, so I also started researching and brainstorming different badge designs. I researched newer models as well as older models of pickup trucks for inspirations and attended the 2018 Detroit Auto Show for field research. I wanted to create a hood molding and badge that would complement a modern truck but also emulate the character of one on a classic car. I have always loved classic cars and the unique lines and amazing details they comprise of. I especially like the look of pickup trucks from the 1940’s. The rounded hoods and chrome details have always seemed interesting to me, and I wanted to incorporate that style in my hood molding and badge design.
After researching different moldings and badges from various time periods, I began to sketch different designs. I sketched designs involving wings since many classic cars have hood badges with winged figures on them. I rounded edges, extended the molding up the sides of the hood, and changed the thickness of the molding until I had a few designs that I wanted to expand upon. I considered the positives and negatives of each design and was able to narrow my choices down to two different designs. One was a thick molding that seemed to fit the style of modern pickup trucks while the other design comprised of character resembling classic pickup trucks. I was torn between the two designs, so I began to develop both of them. I created larger and more detailed sketches to better visualize the moldings and badges. I even did smaller sketches of the moldings and badges on the hood of the truck to see which one looked the best. After some consideration, I decided to go with the molding and badge that had the most character. I then began to finalize my design.
The final molding design was a relatively thin chrome molding that covered the edge of the hood as well as went up the side of the hood to create a wing like look. Even though my design was inspired by the look of the 1940’s pickup trucks, I wanted the intent to be sleek and futuristic by slimming down the edges and extending the molding into the hood. The molding runs up the center of the hood slightly to resemble the chrome molding that runs up the hoods of 1940’s pickup trucks. To highlight the noticeability of the badge, the molding is raised slightly in the center. The badge continues wing theme and I created a vague and nonspecific winged creature. It has elements of an eagle, bat, and angel, which leaves it open for the viewer’s own interpretation. I decided that I would create detailed hand drawings of the hood molding and badge as I would be able to explore my creativity the best that way. I wanted to draw several detailed drawings to thoroughly convey my design. I drew a detailed view of the badge and shaded it to create a realistic image. I also drew a detailed side view of the badge to show the molding’s unique profile. The angled view of the molding and badge shows how the design would appear on the hood of the pickup truck. I added as much detail and shading to the drawings that I could to best convey my design.
Through the design process, I considered different finishes and details, and sketched different versions of the badge. I ultimately decided to make the badge all polished chrome with the wings of the figure having etched chrome details. The rest of the molding will also be polished chrome to continue the resemblance to the moldings of 1940’s pickup trucks. After I finished designing and drawing the hood molding and badge, I began to plan out how I would display my designs. I eventually decided on a presentation with my beginning sketches in progression up to the final detailed drawings. The display I have submitted is the end result of my design process for the ASBE Design Concept Challenge of a hood molding and badge for a mid-size pickup truck.
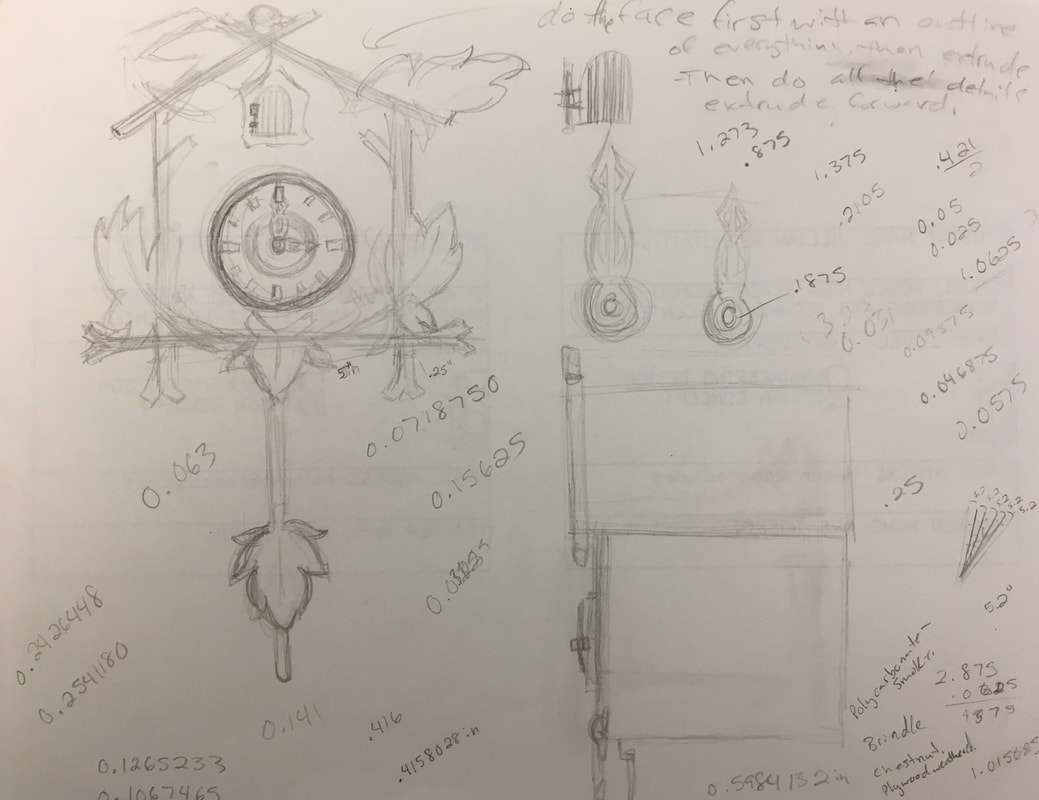
Cuckoo Clock
Below is a 3D assembly drawing of a cuckoo clock. I based the design off of a my grandparent's cuckoo clock. I have always found the clock interesting, and I have even drawn the clock in pastel here. Since I already drew the clock in my art class, I thought it would be interesting to draw the clock in Inventor. I also thought having the clock drawn with pastel and in Inventor would be a unique addition to my portfolio. I changed and simplified the clock due to its intricate details and time constraints for the project. After I drew and created the assembly of the clock, I began assigning different materials and colors to specific parts and details of the clock in order to render the clock and make it photo realistic.
Sketches